
 打赏
打赏
Godot 免费跨平台游戏引擎 (四、脚本GDScript)
Godot设计理念
面向对象的设计与组合
Godot可以让您 组合或聚合 场景。就像嵌套的预制件一样:您可以创建 BlinkingLight 场景,并创建使用 BlinkingLight 的 BrokenLantern 场景。然后,创建一个充满 BrokenLanterns 的城市。更改BlinkingLight的颜色,保存,城市中的所有 BrokenLantern 都会立即更新。(对象)
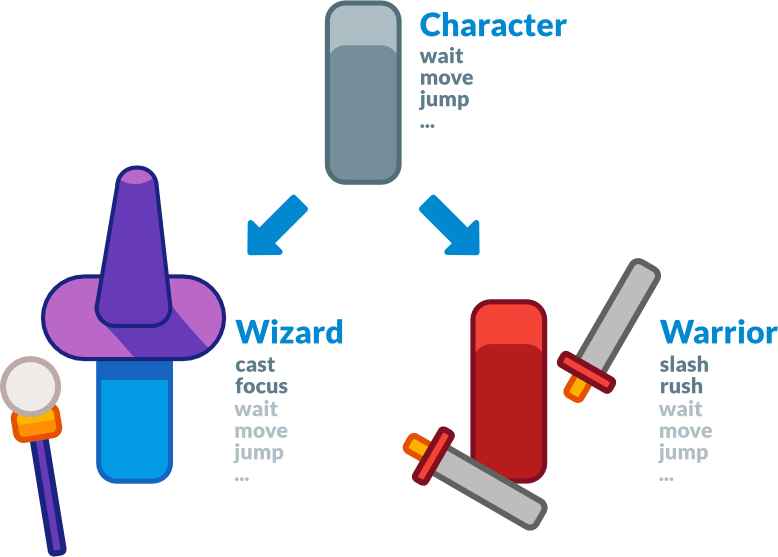
Godot提供了许多不同类型的对象,称为节点,每种对象都有特定的用途。
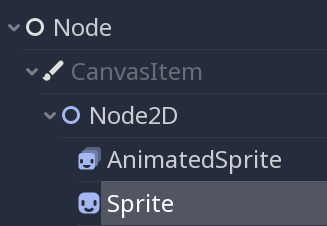
Sprite 是 Node2D,CanvasItem 和 Node 类型。它具有三个父类的所有属性和特性,比如 transforms 或者绘制自定义形状和渲染自定义着色的能力。
全包
目标是提供一个完整的软件包来创建游戏以及持续的用户体验。但您仍然可以和外部程序一起工作,只要有一个导入插件做支持。或者您可以自己创建一个,比如 Tiled Map导入器 。
使用GDNative,您可以编写出使用类似C、C++、Rust或Python(使用Cython编译器)这类的编译语言编写的高性能代码,而无需重新编译引擎。

3D工作区不像2D工作区有那么多工具。您将需要外部程序或插件来编辑地形、动画复杂角色,等等。
Godot编辑器是一个Godot游戏
独立的2D能3D引擎
开源与社区驱动
使用 Control 节点设计界面
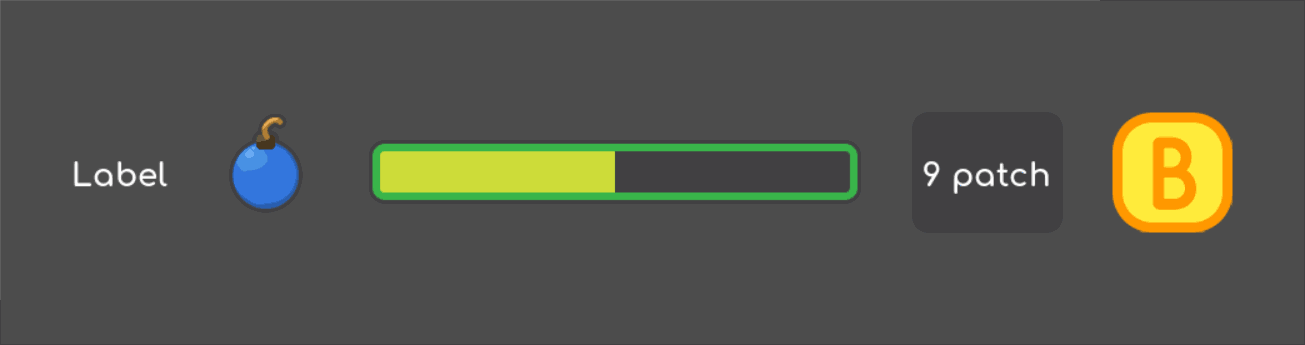
5个最常见的UI元素
- Label 显示文本
- TextureRect 背景,或应为静态图像的所有内容
- TextureProgress 适用于生命条、进度条、水平杆、垂直杆或径向杆
- NicePatchRect 可缩放面板
- TextureButton 用于创建按钮
TextureRect
在UI内显示纹理或图像,提供了多种缩放模式:平铺、保持、保持纵横比等等。
与Sprite节点一样,可以调制TextureRect的颜色,点击Visibility->Modulate。
TextureButton
纹理按钮类似于纹理矩形,只不过它有5个纹理槽,每个纹理槽对应一个按钮状态。
TextureProgress
可以多达3个精灵来创建进度条。Under 和 Over 纹理将显示进度条的值的 Progress 夹在中间。
Mode 控制进度条的方向:水平,垂直或径向。
标签
NinePatchRect
将纹理分割为3行和3列。绽放纹理时,中心和侧面会平铺,但不会缩放角落。适合构建面板、对话框等。
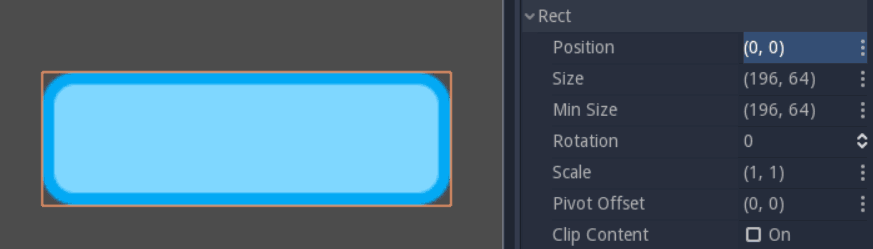
用锚精确旋转UI元素

锚定义节点的左、上、右、下边缘的原点或参考点。
使用容器自动排列控制节点
5个最有用的容器
MarginContainer 在UI的部件周围添加边距
CenterContainer 将其子项放在中心
VboxContainer / HboxContainer 在行或列排列UI元素
GridContainer 以格子排列 Controls 节点
设计标题画面
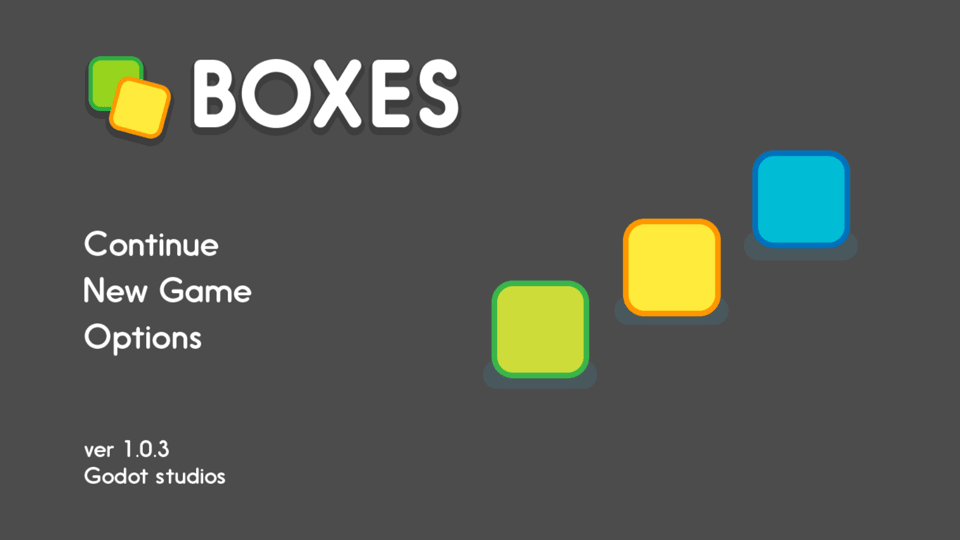
一般在实施之前,我们需要绘制一个简单的样子。
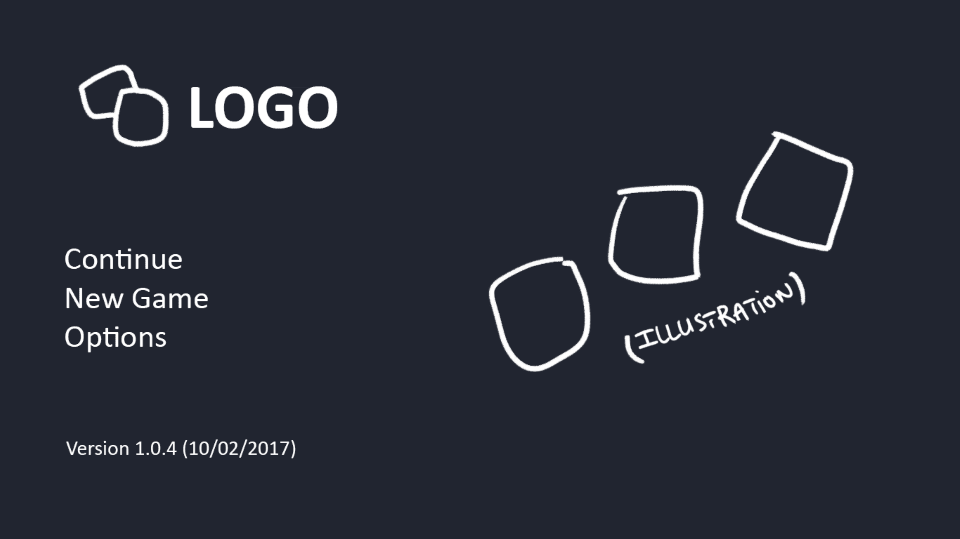
分解UI模型

准备主菜单场景
添加根节点 MarginContainer,这是大多数界面的良好起点,因为一般周围都需要一些边距。保存场景为 MainMenu。
选择 MarginContainer 节点,属性 Custom Constans 部份,设置边距:上下80,左右120。然后打开布局菜单,选择整个矩形,让它填满界面。
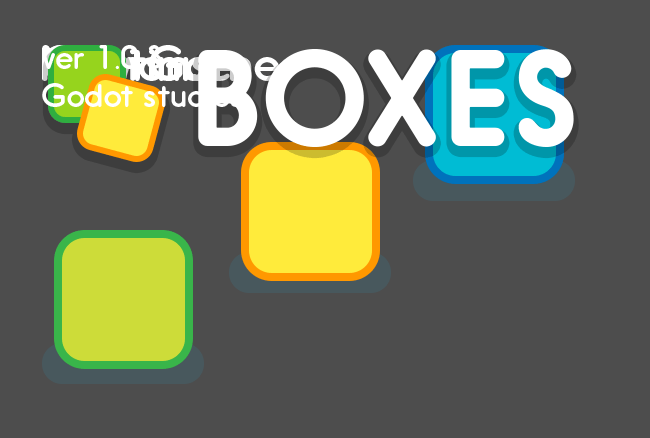
在主节点 MarginContainer 下,添加 TextureRect 节点,在 Texture 属性中加载相关图片。
反正乱七八遭的样子就对了
添加容器放置元素
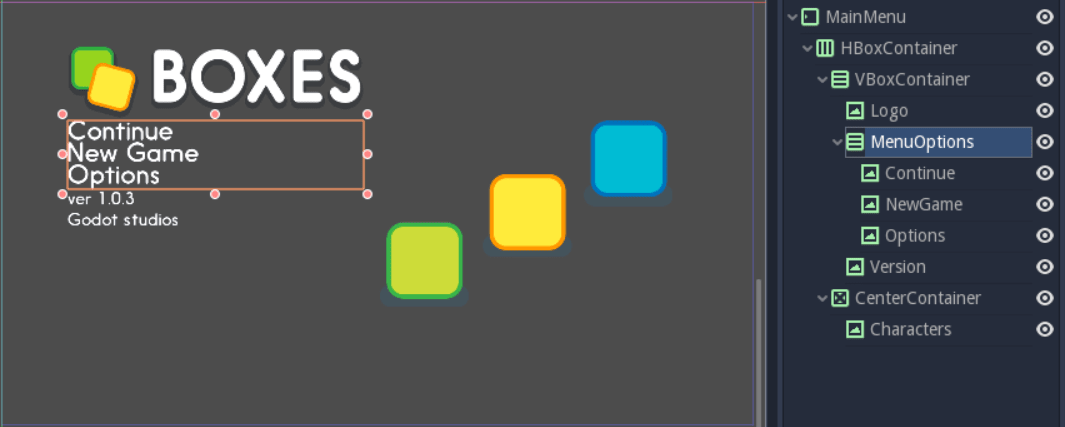
根据分析的布局,在主节点下应该放一个“列布局”,将屏幕分为左右两部份。在“列布局”下,左方为行布局,右方为中心内容。依次将各个元素拉进节点下方。看起来如图:
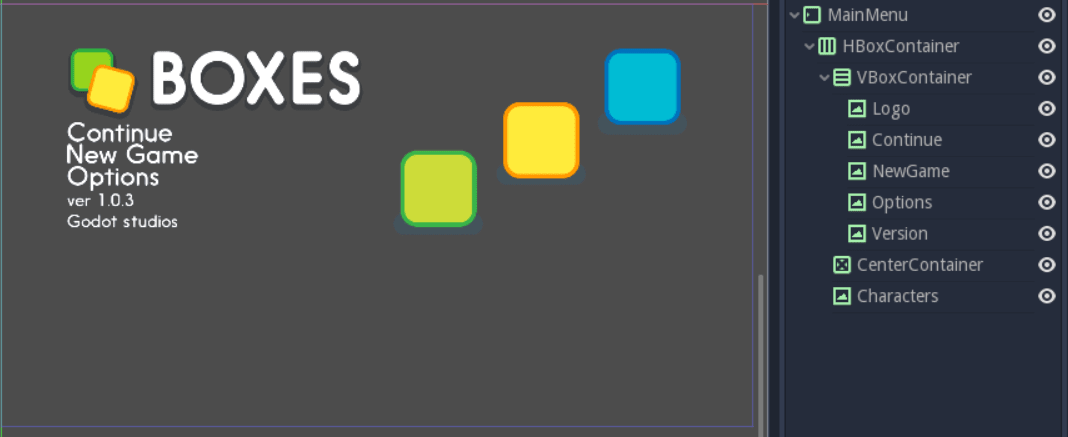
看起来有点样子了,不过间距、位置都还得调整,现在的样子是它自动排列的。若节点位置不对,会出现C项在A项上方,在节点中向上或向下移动即可。
选择 CenterContainer 节点, 在 Size Flags(尺寸标记)下,垂直和水平,均选择 Fill(填充) 和 Expand(扩展) 两项。
在左方布局中,添加子节点VBoxContainer,将菜单放于其它作为子节点。看起来是这样了:
同样选择 MenuOptions 节点的 Size Flags ,选择 垂直(Vertical)属性,勾选 Expand 和 Fill。选择 Alignment 为 Center居中。
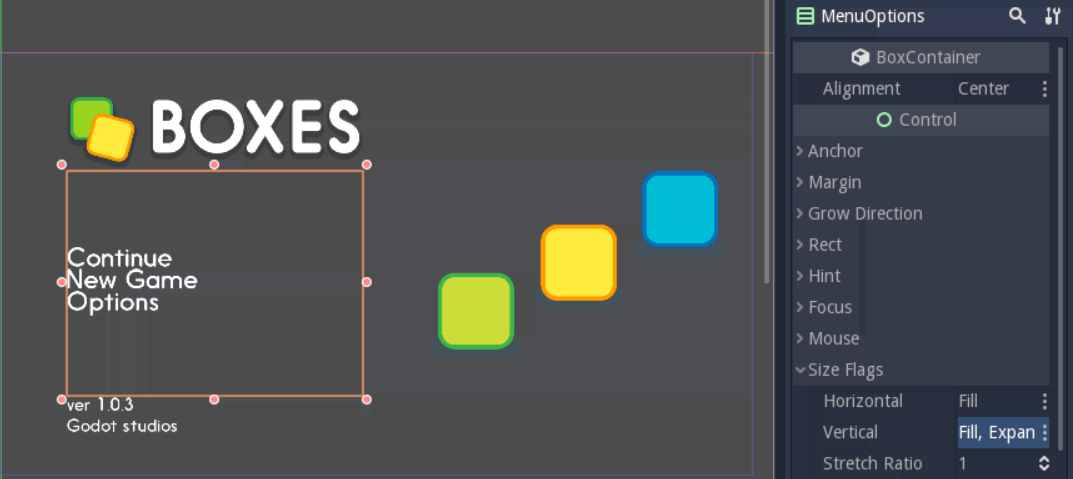
看起来MenuOptions太挤了,选择 Size Flags 下方的 Custom Constants ,在 Separation 增加间隔30。
完成,框框套框框。
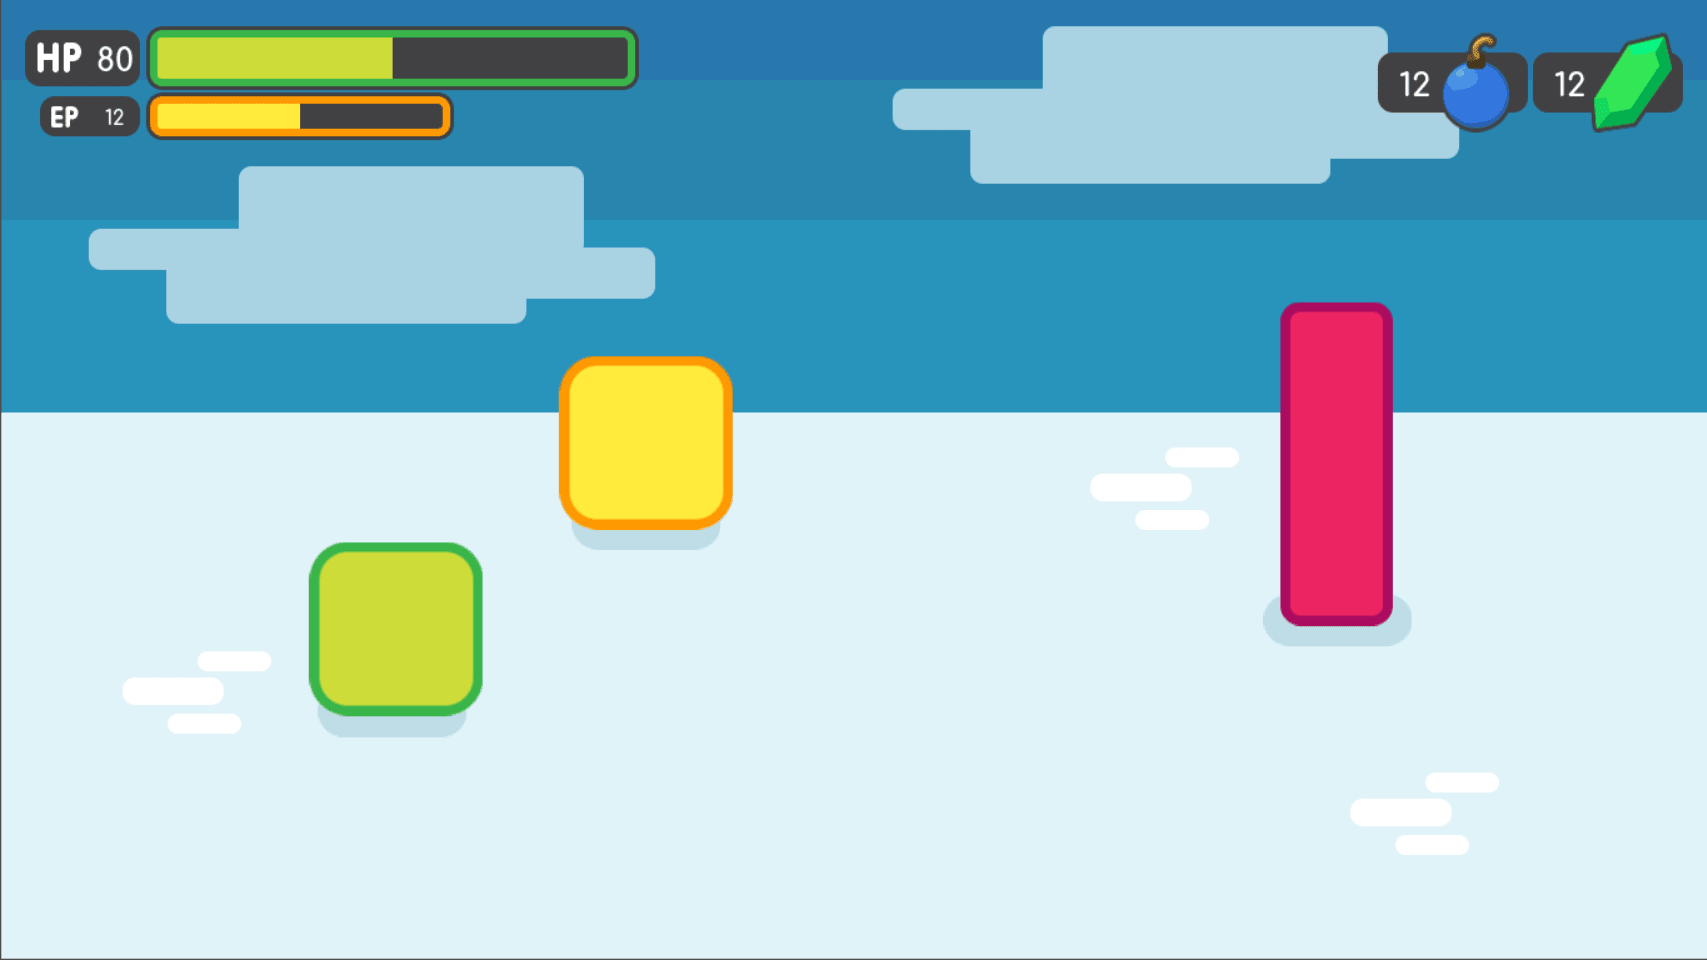
设计GUI
目标成品
拆解

- 左右两个部份,列框
- 左方上下两个部份,横框
- 右方两个部份,列框
- 最外边一个边距框
MarginContainer,命名GUI,布局中选择顶部宽Top Wide,即在顶部,宽度与屏幕相同。Custom Constants 将边距均设为20。
添加HBoxContainer节点,在其它添加VBoxContainer(放左方内容)和HBoxContainer(放右方内容)

。。。
资源
节点和资源
节点提供绘制精灵、3D模型、模拟物理、排列用户界面等。 资源是数据容器。节点使用资源包含的数据。
当多次实例化一个场景时,引擎只会加载该场景的一个副本。
代码中加载资源
func _ready():
    var res = load("res://ro.png")
    get_node("sprite").texture = res
预加载 preload 会从硬盘中读取文件,并在编译时加载它。它只能使用常量字符串路径加载。
func _ready():
    var res = preload("res://ro.png")
    get_node("sprite").texture = res
加载场景
场景也是资源,保存到磁盘的场景是 PackedScene 类型的资源。该场景被打包在资源内部。
要获得场景的实便,必须使用 PackedScene.instance() 方法。
func _on_shoot():
    var bullet = preload("res://bullet.tscn").instance()
    add_child(bullet)
释放资源
当资源不再使用时,它将自动释放自己。
创建自己的资源
用户可以编写资源肚。资源脚本继承了在对象属性和序列化文本或二进制数据之间自由转换的能力。
extends Node

class MyObject:
     extends Ojbect
     var dict = {}

func _ready():
     var obj1 = MyObject.new()
     var obj2 = MyObject.new()
     obj1.dict.greeting = "hello"
     obj2.dict = obj1.dict
     obj1.free()
     print(obj2.dict.greeting)  #示例上说这里发生错误,但实际情况却并没有。它是复制了一个实例,而非指向obj1。

     #据说正确的方式应该是下面的
	 obj1 = MyObject.new()
     obj1.dict.greeting = "hello"
     obj2.dict = obj1.dict.duplicate() # Now we are passing a copy, not a reference.
     obj1.free()                       # obj2's Dictionary still exists.
     print(obj2.dict.greeting)         # Prints 'hello'.
通过脚本自定义属性,可以在属性检查器中显示并编辑。
extends Resource
export(int) var health
export(Resource) var sub_resource
export(Array, String) var strings

func _init(p_health = 0, p_sub_resource = null, p_strings = []):
    health = p_health
    sub_resource = p_sub_resource
    strings = p_strings

# bot.gd
extends KinematicBody

export(Resource) var stats

func _ready():
    # Uses an implicit, duck-typed interface for any 'health'-compatible resources.
    if stats:
        print(stats.health) # Prints '10'.
extends Resource

const BotStats = preload("bot_stats.gd")

var data = {
    "GodotBot": BotStats.new(10), # Creates instance with 10 health.
    "DifferentBot": BotStats.new(20) # A different one with 20 health.
}

func _init():
    print(data)
文件系统
project.godot 是项目描述文件,该文件使用ini格式以纯文本保存。
res:// 资源路径,始终指向项目根目录,仅编辑时才是读写的。
user:// 用户路径,用于存储数据等
场景树
场景是节点的集合。
根视图
根Viewport位于场景顶部
get_tree().get_root()  #通过场景获取
get_node("/root") #通过绝对路径获取
场景树
当节点直接或间接连接到根视图时,它成为场景树的一部份。
树顺序
更改当前场景
加载场景后,通常需要更改该场景为另一场景。简单的方法是使用SceneTree.change_scene()
func _my_level_was_completed():
    get_tree().change_scene("res://levels/level2.tscn")

#先预载的场景
var next_scene = preload("res://levels/level2.tscn")

func _my_level_was_completed():
    get_tree().change_scene_to(next_scene)
这样的缺点是:游戏将停止,直到新场景被加载并运行。在游戏中,更好的体验应使用加载进度条。
单例(自动载载)
Godot中,没有一种方法提供存储多个场景所需的信息,例如比赛分数或库存物品。
虽然可以使用一些变通的方式,但都有各自的缺点。例如通过主场景保存数据,其它场景只作为它的子级。或者通过user://下的磁盘进行保存工加载。
单例模式是解决需要在场景之间存储持久信息的常见用例的工具。
使用此概念,可以创建对象: 始终加载,无论当前正在运行哪个场景 可以存储全局变量 可以处理切换场景和场景之间的过渡 表现得象一个单例对象,因为GDScript在设计上不支持全局变量
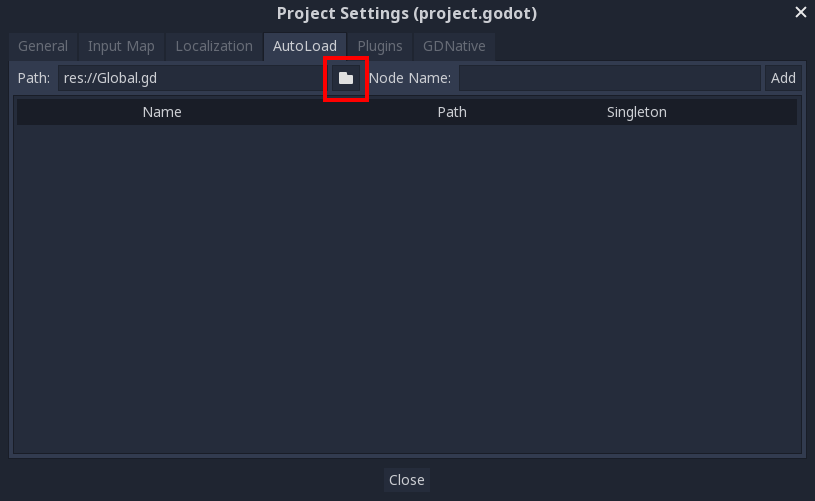
自动加载
可以使用 自动加载(AutoLoad) 加载继承自 Node 的场景或脚本。在菜单中选择 项目->项目设置->自动加载选项卡

这意味着任何节点都可以通过以下方式访问名为 PlayVariables 的单例:
var player_vars = get_node("/root/PlayerVariables")
player_vars.health -= 10
在设置中选择单列启用,可以如下直接的调用
PlayerVariables.health -= 10
自定义场景切换器
添加一个全局脚本 Global.gd,确保脚本继承自 Node,并将它添加到工程设置中。这样无论何时在项目中运行任何场景,该脚本都将始终加载。
在此脚本 _ready() 函数中获取当前场景。
extends Node

var current_scene = null

func _ready():
    var root = get_tree().get_root()
    current_scene = root.get_child(root.get_child_count() - 1)

func goto_scene(path):
    call_deferred("_deferred_goto_scene", path)

#这是主要函数,用于场景切换
func _deferred_goto_scene(path):
    current_scene.free()  #安全移除当前场景
    var s = ResourceLoader.load(path)  #载入指定场景
    current_scene = s.instance()  #实例化场景
    get_tree().get_root().add_child(current_scene)  #将当前场景添加到根节点
    get_tree().set_current_scene(current_scene)   #可选,使其与SceneTree.change_scene兼容
然后就是在各场景按钮中添加类似以下代码,用于加载场景:
func _on_Button_pressed():
    Global.goto_scene("res://Scene2.tscn")
当然,场景小的时候,这样没有什么问题。如果场景比较大,这关的转场是不友好的。就需要用到“后台加载“
后台加载
ResourceInteractiveLoader
象它的名字一样,此类允许在阶段加载资源,每次调用 poll 方法时,都会加载一个新阶段,并将控制权返回给调用方。
用法
获取 ResourceInteractiveLoader Ref ResourceLoader::load_interactive(String p_path);
轮询 Error ResourceInteractiveLoader::poll();
没有错误返回OK,加载完成反回ERR_FILE_EOF。
加载进度(可选)
要查询加载进度
int ResourceInteractiveLoader::get_stage_count() const;   返回要加载的阶段总数
int ResourceInteractiveLoader::get_stage() const;  返回当前正在加载的阶段
强制完成(可选) Error ResourceInteractiveLoader::wait();
获取资源 Ref ResourceInteractiveLoader::get_resource();
示例
结合上例要学习后台加载功能。在Global.gd中添加一些变量:
var loader
var wait_frames
var time_max = 100
var current_scene

func _ready():
    var root = get_tree().get_root()
    current_scene = root.get_child(root.get_child_count()-1)

func goto_scene(path):
    loader = ResourceLoader.load_interactive(path) #分多阶段加载场景
    if loader == null:   #加载发生错误
       show_error()
       return
    set_process(true)  #轮询加载程序

    current_scene.queue_free()

    get_node("animation").play("loading")   #开始一个载入动画
    wait_frames = 1

#这里负责处理轮询
func _process(time):
    if loader == null:     #之前加载出错,不需要处理任何轮询事件
       set_process(false)
       return
    if wait_frames > 0:    #等待一帧,让载入动画显示出来
       wait_frames -= 1
       return

    var t = OS.get_ticks_msec()
    while OS.get_ticks_msec() < t + time_max:  #用time_max控制阻塞时间,查看加载进度
       var err = loader.poll()   #轮询加载程序
       if err == ERR_FILE_EOF:   #加载完毕
          var resouce = loader.get_resouce()
          loader = null
          set_new_scene(resource) #将新场景放在树上
          break
       elif err == OK:      #没错误,继续轮询
          update_process()  #更新进度条或动画
       else:
          show_error()
          loader = null
          break
func update_progress():
    var progress = float(loader.get_stage()) / loader.get_stage_count()  #加载百分比
    get_node("progress").set_progress(progress)  #更新进度条

    var length = get_node("animation").get_current_animation_length()  #或者更新一个进度动画

    get_node("animation").seek(progress * length, true)  #调用一个暂停的动画,用true参数强制更新

func set_new_scene(scene_resource):
    current_scene = scene_resource.instance()   #实例化场景
    get_node("/root").add_child(current_scene)  #加到root下
使用多个线程
多个线程无疑更快,但要记住以下几点:
使用信号
在线程等待主线程请求一个新资源时,使用信号来控制休眠状态,而不是一个繁忙的循环。
轮询期间不阻塞主线程
如果一个互斥体允许从主线程调用,那么在对装器类调用poll时不要锁定主线程。 当资源完成加载时,它可能需要来自您低级API的一些资源,这些api可能需要锁定主线程来获取这些资源。 如果主线程正在等待您的互斥,而您的线程正等待加载资源,这可能会导致死锁。
示例类
官方提供了一个用于在线程中加载资源的示例类resource_queue.gd
var thread
var mutex
var sem

var time_max = 100 # msec

var queue = []
var pending = {}

func _lock(caller):
    mutex.lock()

func _unlock(caller):
    mutex.unlock()

func _post(caller):
    sem.post()

func _wait(caller):
    sem.wait()


func queue_resource(path, p_in_front = false):
    _lock("queue_resource")
    if path in pending:
        _unlock("queue_resource")
        return

    elif ResourceLoader.has(path):
        var res = ResourceLoader.load(path)
        pending[path] = res
        _unlock("queue_resource")
        return
    else:
        var res = ResourceLoader.load_interactive(path)
        res.set_meta("path", path)
        if p_in_front:
            queue.insert(0, res)
        else:
            queue.push_back(res)
        pending[path] = res
        _post("queue_resource")
        _unlock("queue_resource")
        return

func cancel_resource(path):
    _lock("cancel_resource")
    if path in pending:
        if pending[path] is ResourceInteractiveLoader:
            queue.erase(pending[path])
        pending.erase(path)
    _unlock("cancel_resource")

func get_progress(path):
    _lock("get_progress")
    var ret = -1
    if path in pending:
        if pending[path] is ResourceInteractiveLoader:
            ret = float(pending[path].get_stage()) / float(pending[path].get_stage_count())
        else:
            ret = 1.0
    _unlock("get_progress")

    return ret

func is_ready(path):
    var ret
    _lock("is_ready")
    if path in pending:
        ret = !(pending[path] is ResourceInteractiveLoader)
    else:
        ret = false

    _unlock("is_ready")

    return ret

func _wait_for_resource(res, path):
    _unlock("wait_for_resource")
    while true:
        VisualServer.sync()
        OS.delay_usec(16000) # wait 1 frame
        _lock("wait_for_resource")
        if queue.size() == 0 || queue[0] != res:
            return pending[path]
        _unlock("wait_for_resource")


func get_resource(path):
    _lock("get_resource")
    if path in pending:
        if pending[path] is ResourceInteractiveLoader:
            var res = pending[path]
            if res != queue[0]:
                var pos = queue.find(res)
                queue.remove(pos)
                queue.insert(0, res)

            res = _wait_for_resource(res, path)

            pending.erase(path)
            _unlock("return")
            return res

        else:
            var res = pending[path]
            pending.erase(path)
            _unlock("return")
            return res
    else:
        _unlock("return")
        return ResourceLoader.load(path)

func thread_process():
    _wait("thread_process")

    _lock("process")

    while queue.size() > 0:

        var res = queue[0]

        _unlock("process_poll")
        var ret = res.poll()
        _lock("process_check_queue")

        if ret == ERR_FILE_EOF || ret != OK:
            var path = res.get_meta("path")
            if path in pending: # else it was already retrieved
                pending[res.get_meta("path")] = res.get_resource()

            queue.erase(res) # something might have been put at the front of the queue while we polled, so use erase instead of remove

    _unlock("process")


func thread_func(u):
    while true:
        thread_process()

func start():
    mutex = Mutex.new()
    sem = Semaphore.new()
    thread = Thread.new()
    thread.start(self, "thread_func", 0)
func start() 在实例化类之后调用以启动线程
func queue_resource(path, p_in_front = false) 将资源排队, p_in_front将其放在队列前面
func cancel_resource(path) 从队列中删除资源,丢弃任何已完成的加载
func is_ready(path) 如果资源已完全加载并准备好检索,返回true
func get_progress(path) 获取资源的(载入)进度。加载进度介于0.0和1.0之间则返回-1。
func get_resource(path) 返回已完全加载的资源,错误时返回null。如资源未完全加载(即is_ready返回false),它将阻塞线程并完成加载。如果资源不在队列中,它将调用ResourceLoader::load正常加载并返回它。
示例
queue = preload("res://resource_queue.gd").new() #加载并初始
queue.start()

queue.queue_resource("res://pause_menu.tres")  #假设你需要10秒钟来切换场景,这时间内,用户无法交互。
start_cutscene()

pause_menu = queue.get_resource("res://pause_menu_tres").instance()  #当用户点击暂停菜单
pause_menu.show()

queue.queue_resource("res://level_1.tscn",true)  #当用户需要一个新的场景时,用true参数让这个请求在队列最前面,暂停其它的加载

#检查进度
if queue.is_ready("res://level_1.tscn"):
   show_new_level(queue.get_resource("res://level_1.tscn"))
else:
   update_process(queue.get_process("res://level_1.tscn"))

queue.cancel_resource("res://zone_2.tscn")   #用户离开触发区时,放弃加载